Pàgina 2 de 3

Your own OpenStreetMap API

OpenStreetMap (OSM) is a great project , good place where to find GIS information and a good software. Sometimes you will be able to solve a project requirement only with the OSM software but you don’t want to make some information public or this information won’t be relevant to be included in OSM.

With this you will be able to create your own OSM server.

Prepare the code

The first step is to clone the code from the oficial OSM repo here but it must be with the branch docker-compose-take2, we will have to do:

git clone https://github.com/openstreetmap/openstreetmap-website.git

Prepare the data

Now we need the data to load on our database. I recomend to download it from Geofabrik . To do this test we will download an small country like Andorra.

wget https://download.geofabrik.de/europe/andorra-latest.osm.pbf

Prepare the docker

To prepare the docker first we need to create the docker image, this is described on the docker-compose file so run:

docker-compose build
docker-compose up -d

After this, we will load the data on the database

cp config/example.storage.yml config/storage.yml
cp config/docker.database.yml config/database.yml
touch config/settings.local.yml

docker-compose build
docker-compose up -d

docker-compose run --rm web bundle exec rake db:migrate # To prepare the db schema
docker-compose run --rm web osmosis \
        -verbose    \
        --read-pbf andorra-latest.osm.pbf \
        --write-apidb \
            host="db" \
            database="openstreetmap" \
            user="openstreetmap" \
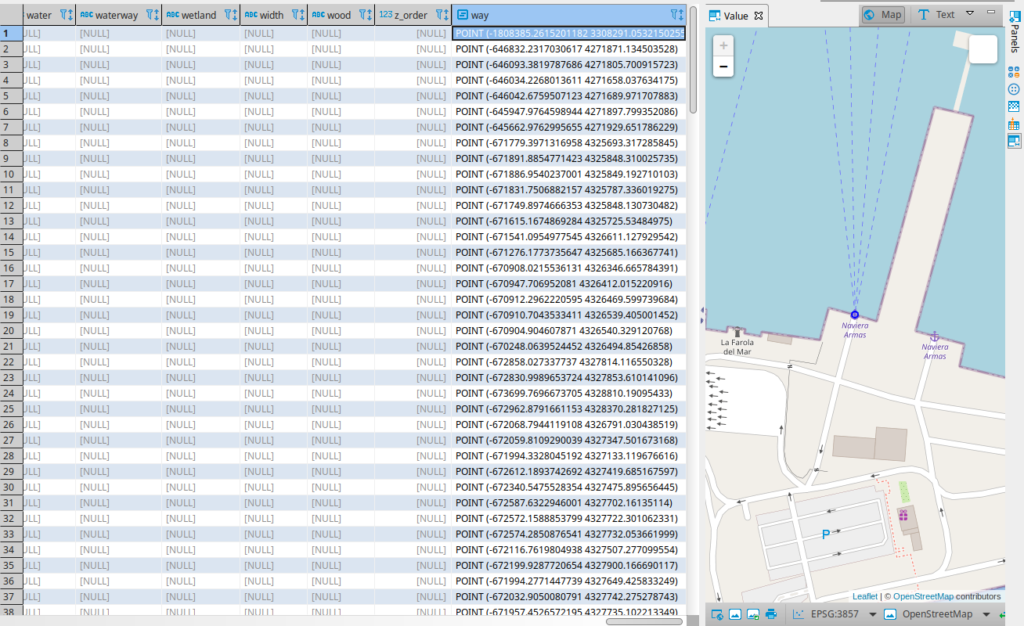
            validateSchemaVersion="no"

Now you can see the web working at http://localhost:3000

Create users

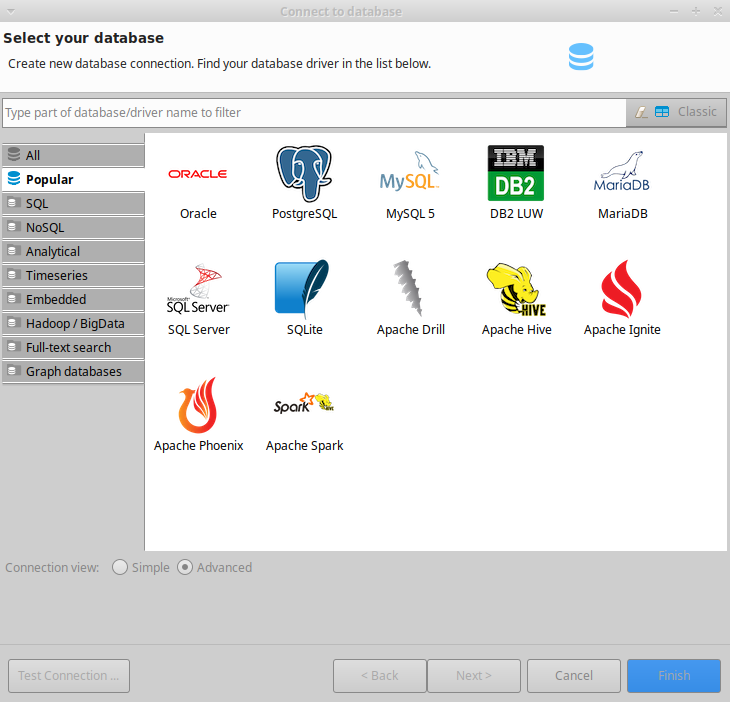
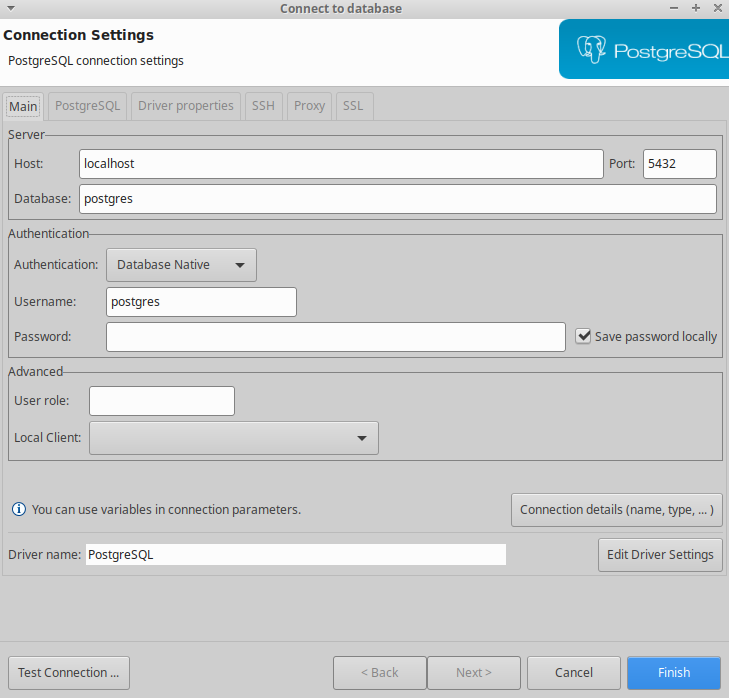
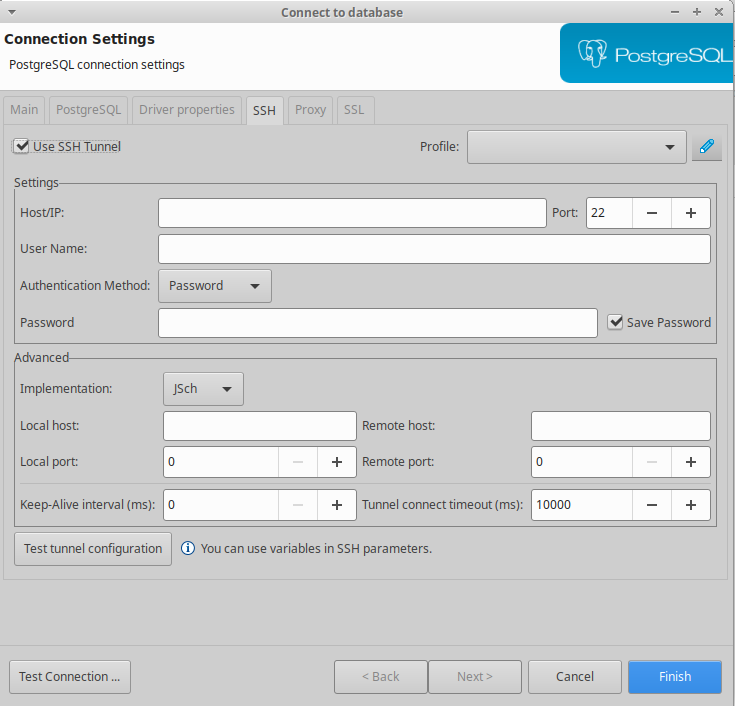
This docker image doesn’t have an email server so when you create an user this will not send the validation email and the users will not be activated. To solve this you need to connect to the database (for example with Dbeaver ) and activate the user with this query:

update users set status='active' where status='pending';

Configure iD editor

With your user you have to go to the “User>Preferences>Oauth configuration” and register a new application:

Name: iD

Application URL: http://localhost:3000/oauth/request_token

After this the on the next page it will give us a token that we will need to add to the file /var/www/config/application.yml on the id_key field.

Once we have this we need to restart the apache server with this command:

/etc/init.d/apache restart

5 Python tricks

This is a short list of less known tricks that I use in Python

Delete repeated elements of a list

An easy way to delete repeated elements from a list is to convert it to a set and then convert to a list. This works because a set can’t have repeated elements.

a = [1,1,2,3]
print(list(set(a)))
[1, 2, 3]

Serve static files with HTTP

The python interpreter has the SimpleHttp module which is very useful. If you run this command on a directory you will be able to access to the files thought http.

python3 -m http.server 8080

Join a list of strings with a string separator

A useful not so known str function it’s the join method. You can use this to join a list with a string

",".join(["1","2","3"])
'1,2,3'

With this you don’t have to control if it’s the last element of the list to add the separator

Use a dictionary to pass parameters to a function

Sometimes you need to send data to functions and you need to adapt the same data to the function parameters, you can do this with the operator ** . This operator passes the values of the dictionary to a function using the key as a parameter name:

def function1(param1):
   print(f"function1:{param1}")

def function2(param2):
   print(f"function2:{param2}")

data ="hi"
data_function1 = {"param1": data}
data_function2 = {"param2": data}
function1(**data_function1)
function2(**data_function2)

Make ifs more readables

On of the zen of python is “Readability counts.” . This example shows a correct way to check None and False values on an if

# Wrong way
value = None
if value is None:
   print("No value")

# Wrong way
value = False
if value == False:
   print("Value False)

# Correct way
if not value:
   print("value false or None)

SSH tunnel

SSH is a great tool to open remote secure shells, this is widely used but a less know option SSH has is that can be used to acces the network of the remote server.

Usually if you work with VPS , by security you only open the ports essential, but imagine that you have to access a management web of the server that only can be accessed from loacalhost.

You can solve this with ssh tunneling

ssh remoteserver -L 8090:localhost:8080

This can be a bit confusing but let me explain the parts:

  • ssh remoteserver : Usual ssh remote shell
  • -L : Specifies port forwarding
  • 8089: Local port, the port where your browser will connect
  • localhost: Remote connection, ip address where the remote ssh will connect
  • 8080: Remote port where the remote ssh will connect

If you try this you will notice that it opens a remote shell, if you don’t need it you can additionally add the -N argument to avoid it

Sentry

Sentry is another service you don’t know that you need it until you try it.Basically Sentry is a service that catches the exceptions in your code and sends it to a web service to be analyzed, also sends you an email to notify you.

Sentry server is an opensource server that can be installed on your own server, also sentry can work as a SaS and you can use it at https://sentry.io/welcome/

Sentry can work with multiple languages from Python, to JS or Go, you can check all the supported languages here https://sentry.io/platforms/

Configuring sentry with python

First of all you need to create a project like this:

If you use some framework you can specify

Once you created the project you will get an screen like this

After this you will need to install the sentry package with this command:

pip install --upgrade sentry-sdk

You will need to add this on the package, if you use a setyp.py add it on the install_requires key or if you use it on a requirements.txt file you need to add it.

Now we need to initialize the sentry code. We do it adding this code on the entry point of the code.

import sentry_sdk
sentry_sdk.init(
    "!Place here your project DSN"
    traces_sample_rate=1.0
)

With this we have our script configured to catch all the exceptions with Sentry.

Extra usage

We can make our code notify an exception manually with sentry with this code:

from sentry_sdk import capture_exception
try:
    a=1/0
catch Exception as e:
    capture_exception(e)

Also can notify suspicious data without sending an exception with this code:

from sentry_sdk import capture_message
capture_message("Somthing strange")

DBeaver

DBeaver (https://dbeaver.io/download/) is a great gui tool that allows us to connect and query multiple databases (Postgres,Mysql,Oracle…) from multiple operating systems. DBeaver is free but also has a paid version with extra functionalities

Configuring a connection to Postgres

You can create a new connection going to “File>New>DBeaver>Database connection” or clicking on the socket icon. After this we will see a screen like this:

Screen to select the connection driver

After this we can fill the connection information

My recommendation is to test the connection before finishing

Trick

If you want to use this connection to access different databases you can specify this on the PostgreSQL tab, and enable the “Show all databases” option

You can configure more databases like MySQL or Oracle

Configuring a connection with a SSH tunnel

A cool feature of DBeaver is that it can connect to a database that is on a remote machine without having to expose the service to the whole Internet.

To do this you can go to the tab of “SSH” and configure the

Once you fill the host,user and password you can test the connection and finish

Other functionalities

Viewing the database schema

With DBeaver you can see the database diagram using this button or you can see the relations of a single table.

The result is something like this:

Viewing gis data

A cool feature of DBeaver is the integration with Postgis, so if you double click over a geometry field you will be able to preview the feature in a map

Git ignore

Git ignore is a special file in git version control, its specified by the file .gitignore .

As the name indicates, it’s used to make that git not track specific files. For example when you have application logs, configuration files or compiled files.

Examples

If you want to ignore a, specific directory , let’s call it config:

config/*

To ignore all files with the .log extension

*.log

You also can ignore a, specific file, like passwords.pass

passwords.pass

Another less known option is the exceptions, you can use ! to indicate that you want to track an ignored part of a path. In this example you will ignore all except /foo/bar

/*
!/foo
/foo/*
!/foo/bar

Tools

Usually when you make a project you use a template depending on the language that you are using.

You can use this tool to generate a language specific gitignore:

https://www.toptal.com/developers/gitignore

Github also haves a repository with gitignore templates for different languages

https://github.com/github/gitignore

Tmux

Tmux is a terminal multiplexer. This is the kind of tools where you don’t know that you need. This tool is useful when you may work with remote servers via terminal.

This allows you to:

  • Have multiple terminals on the same connection
  • Be able to disconnect from the terminal without terminating the running
  • Share terminal with other users

How to install

To install tmux you can run this command:

apt-get install tmux

How to use:

You can create a new tmux session this command:

tmux

You can attach to an existing running session :

tmux attach 

or a shorter version:

tmux a

Once you are on a tmux session you have the following shortcuts:

  • Control+b+c: Open a new window.
  • Control+b+d: Detach of a tmux session.
  • Control+n: Move to the next window.
  • Control+p: Move to the previous window.
  • Control+b+number: Move to the number window.
  • Control+b+”: Slit the window horizontally.
  • Control+b+%: Split the window vertically.
  • Control+b+$: Rename session
  • Control+b+s: Change the session

Share a tmux session

You can share a tmux session with another ssh session with the same user via ssh.

Also if you can’t share the ssh connection you can use tmate.

You can install tmate with this command:

apt-get install tmate

Once tmate is installed you can run the command:

tmate

This will give you a list of ways to share the tmux session

Fail2ban

Usually,when you deploy a service on a server you, will receive a lot of strange requests trying to discover the services running on your server or attacking it, for example trying to login in the ssh of your server.

Apart from having a strong password and the updated software, fail2ban mitigates this type of attacks blocking the ips that does this request.

How it works

Fail2ban reads the logs of various services that you can configure like ssh or Nginx, and looks for suspicious usages .

Once fail2ban detects incorrect login attempts, fail2ban blocks the ip using iptables

You can check the banned ips using this iptables command:

iptables -L
Example of the output of iptables

How to install and configure

You can install it with:

sudo apt-get install fail2ban

After this, you can configure the services that you want to monitor.

On the DEFAULT section there are the following parameters to configure:

  • bantime: the seconds to ban the ip
  • findtime: Window of time to check the intents of login
  • maxretry: Number of intents

Tip

The time is specificatied in by default seconds, but you can add an m at the end to specificate minutes

After this you can see different sections to enable the services to monitor, for example:

[sshd]

# To use more aggressive sshd modes set filter parameter "mode" in jail.local:
# normal (default), ddos, extra or aggressive (combines all).
# See "tests/files/logs/sshd" or "filter.d/sshd.conf" for usage example and details.
#mode   = normal
port    = ssh
logpath = %(sshd_log)s
backend = %(sshd_backend)s

Finally you can add the tag enable = true to enable fail2ban to enable to monitor ssh

Remote debug

Usually when you develop an application it will not run on the same computer where you are developing. This can caused unexpected behaviors when you deploy it,usually cause by permissions, software/package versions,configuration,ect.. or just that we write an error on our code that we didn’t notice. In those cases, it’s difficult to know what is failing but we can use remote debug to check the application state when it fails.

Tip:

If you are trying to debug a python package and the debugger doesn’t stop, try to install it with the -e flag

I use two tools in these cases:

Visual studio code remote ssh

To remote debug (and develop) with Visual Studio code you mus to install Remote ssh extenison

Once you install it, you can add a host that looks like this:

Add a new host on remote ssh.

And finally open a remote project:

Connect to a remote ssh and run a script.

After this, you can use Visual Studio code like on your own machine

PUDB

Pudb is a package to debug python applications via CLI. If you are used to and feel comfortable using CLI tools this can be a good tool to debug your python application.

To debug it with pudb you need to install the package with pip:

pip install pudb

On your code , add the following code where you want to stop:

import pudb;pu.db

Once the execution reaches the previous line, you will get a window that looks like this:

You can use the following shortcuts to interact with the pudb:

  • Ctrl+x: Go to command line or return to the code
  • n: Step to the next instruction
  • s: Step into
  • c: Continue
  • b: Toggle breakpoint

My Python development environment

Python environment

To develop different python applications and avoid problems with the requirements of each application I use virtualenvs. To have all the virtualenvs o organized you can use virtualenvwrapper. To install virtualenv you can execute:

pip install virtualenv
pip install virtualenvwrapper

IDE

I tried a several IDES to develop in Python lik Pycharm or PyDev and my favorite is Visual Studio Code because it can be used with multiple languages and it is also lightweight.

To install Visual Studio you can run the following commands:

# Install requirements to install
sudo apt install software-properties-common apt-transport-https
# Add Microsoft keys
sudo wget -q https://packages.microsoft.com/keys/microsoft.asc -O- | sudo apt-key add -
# Add visual studio repository
sudo add-apt-repository "deb [arch=amd64] https://packages.microsoft.com/repos/vscode stable main"
# Update apt and install Visual Studio Code
sudo apt update
sudo apt install code

Extensions

  • Python extension: This extension adds Python support for Visual Studio Code
  • Remote SSH : Very useful if you have to debug or test code on a remote server

« Entrades més antigues Entrades més recents »

© 2024 Another dev

Tema de Anders NorenAmunt ↑