Etiqueta: angular

Quickly create web services using OpenAPI

OpenAPI is a documentation format created by Swagger to document how a web service works. It defines the paths, the methods and parameters. Let’s know how to quickly create web services using OpenAPI

Why I use it?

Usually documentation is one of the tasks that developers don’t like because it can be boring, hard, and take time. In this case it is really quick and it can be a way to increase your productivity, because this documentation can be used to generate.

Starting with OpenAPI

The OpenAPI format can be generated and viewed with a lot of tools, but my favorite is Apicurio, a free tool from Redhat. A great feature of it is that it can be collaborative
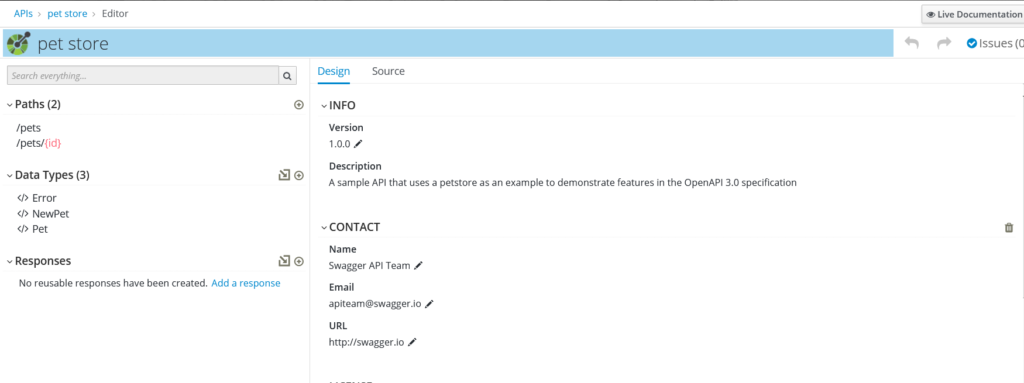
Apicurio studio
How Apicurio looks like

The Apicurio screen is splited on 4 parts

  • Paths: In this part you can see the paths the application uses, you can also click on it to view more details.
  • Data Types: The data types that the application will use and the relation with other data types.
  • Responses : The diferent types of responses of the application
  • Design: The content of this part can change to edit the details of the previous parts
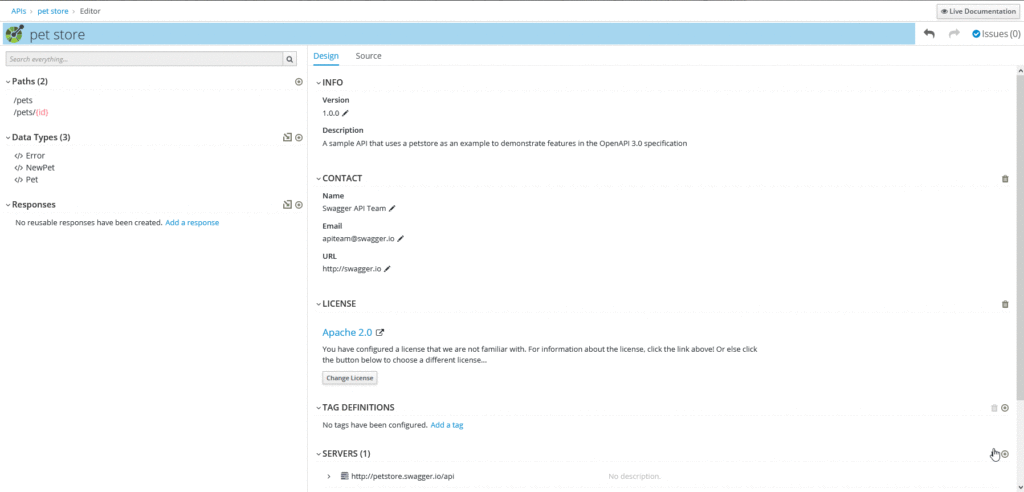
Example of the configuration of a path

Once we have our OpenAPI defined , here starts the magic. We can generate a template code for our applications. To do this you can use this application https://github.com/OpenAPITools/openapi-generator.

Before generation, the code you will need to download is the OpenAPI definition from the Apicurio web

OpenAPI to Flask

If you are used toPython Flask is a great micro framework to create web applications.

openapi-generator-clo generate -g python-flask -i OpenApi.json -o ./code

OpenAPI to Angular

OpenApi can also help you if you are developing a frontend application. You can generate the service of the API using a simple command and it will generate you the code of the service

openapi-generator-cli generate -g typescript-angular -i OpenApi.json -o ./code

Configure sentry on a Ionic Angular app

Sentry is a great tool tool to track errors in our applications, when an error occurs, it is sent to the server, storing it’s trackback and you will receive a notification email. In this article we will learn how to configure sentry on an Ionic Angular Application. On other articles we have seen how to use it with Python.

To explain this, we will start by creating a simple Ionic Application

Sentry with Ionic
Sentry logo

First we create the example application:

ionic start example --type angular tags

Configuration

After this we need to install the npm package

npm install --save @sentry/angular @sentry/tracing

On the main.ts we configure the sentry DSN like this:

import { enableProdMode } from '@angular/core';
import { platformBrowserDynamic } from '@angular/platform-browser-dynamic';

import { AppModule } from './app/app.module';
import { environment } from './environments/environment';

import * as Sentry from '@sentry/angular';
import { Integrations } from '@sentry/tracing';


Sentry.init({
  dsn: 'your sentry dsn',
  integrations: [
    new Integrations.BrowserTracing({
      tracingOrigins: ['localhost'],
      routingInstrumentation: Sentry.routingInstrumentation,
    }),
  ],

  // We recommend adjusting this value in production, or using tracesSampler
  // for finer control
  tracesSampleRate: 1.0,
});


if (environment.production) {
  enableProdMode();
}

platformBrowserDynamic()
  .bootstrapModule(AppModule)
  .catch(err => console.error(err));

Add the ErrorHandler on the providers, on app.module.ts

{
    provide: ErrorHandler,
    useValue: Sentry.createErrorHandler({
        showDialog: false, //You can enable/dissable the report dialog 
    }),
},
{
    provide: Sentry.TraceService,
    deps: [Router],
},
{
    provide: APP_INITIALIZER,
    useFactory: () => () => {},
    deps: [Sentry.TraceService],
    multi: true,
},

Now, with this your application, it is ready to report to the Sentry server. You can test it with calling an undefined function:

undefinedFunction();

If you want to check extra information about this you can check the official documentation

© 2025 Another dev

Tema de Anders NorenAmunt ↑