Categoria: General (Pàgina 1 de 3)

Create JAR with Eclipse

The best way to distribute java applications is using a JAR file that is run with the java VM.

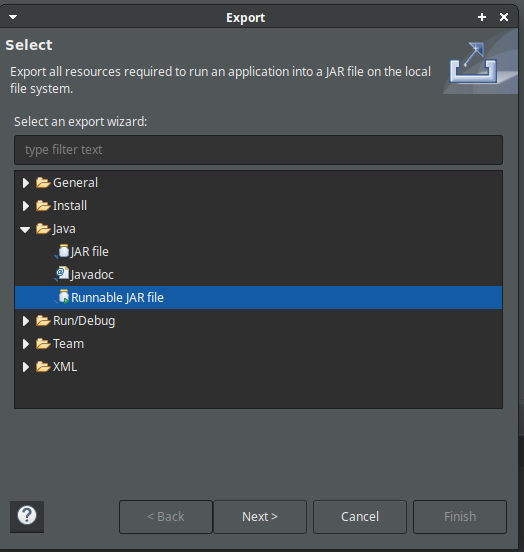
To create a JAR with eclipse we have to go the project explore and click with the right button and on the menu select “Export

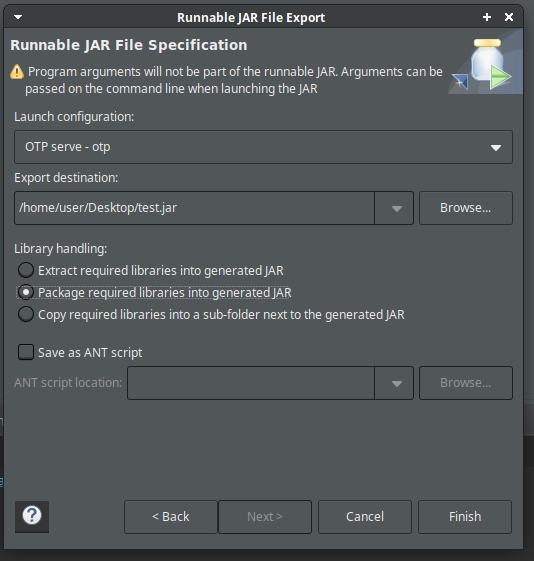
On the next window we select to export as a runnable JAR file

After this, we need to select:

  • The execution entry point (Configured launcher)
  • The export destination
  • And the option to package the jar with libraries

Java Remote Debug with Eclipse

Usually when we develop an application we can replicate the environment where we are running the application to verify that the application works correctly.

Sometimes this is not possible due to some special circumstances (network, special hardware, amount of data, client restrictions,ect..) when we find an error while in this special circumstances, we need to do a remote debug.

Launch the application on the server

First we need to run the application on the server. We can generate a jar file using this instructions.

We need to launch the application with some special arguments:

java -Xdebug -Xrunjdwp:transport=dt_socket,address=1088,server=y,suspend=n -jar hello.jar

Connect Eclipse to the application to debug

To connect to the remote process we need to indicate the host where to connect and the port.

After this, you can debug the application as it was on your local machine.

If you can’t open any port of the server and you only have ssh access this article can be useful

KeepassXC

We usually all we have to save a lot of users and passwords .Theses passwords can’t be stored on plain text and must be different on each account.

To make the management of these passwords easier I recommend to use KeePass XC because it allows to have access to all the stored passwords only remembering one password that unlocks all.

KeePass XC is compatible with the files created with KeePass, it’s opensource and multi-platform.

Browser Integration

One of the features that I like more of KeePass XC is the browser integration, this makes easier to use the passwords on the browser.

It have plugins for Firefox and Chrome . To configure the plugins you first need to enable it on Settings>Browser Integration.

After this the plugin will request permission to KeePass XC to access and you need to allow.

Once this is done you can use the KeePass passwords to login on the browser.

Link another KeePass file from one

Usually you can have different KeePass XC file for each project. But you have to unlock each manually. You also can have a main KeePass XC file that unlocks all the others, even they are on a network.

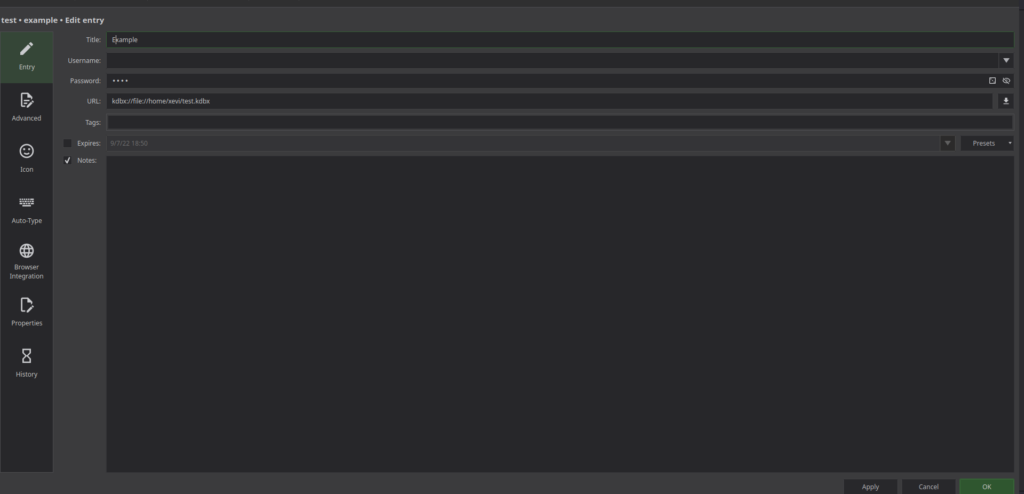
You can add a URL to a file starting with kdbx:// to indicate that the entry opens a KeePass file

Example

Once you create the entry you can open the database clicking the url of the entry:

Same entry with multiple URLs

Usually we have a KeePass entry that has multiple URLs for the same authentication, for example local and remote access.

To make easier to use the browser integration , a solution for this problem is to create multiple entries with the same user and password but with different URLs. To keep the username and password updated you can use references to the original entry.

You can clone an entry on the contextual menu of the entry and “Clone Entry”

Options to clone an entry

With this way the new entry don’t have a hardcoded user and password and references to the original.

AutoOpen

A very useful feature of KeePass is AutoOpen. This allows us to open a keepass file every time we open this file.

To do this we jus have to create a folder on the root of our keepass

This is very useful when you usually use some keepass files related whith this one

Set the login fields manually on Firefox

You can set the login fields manually on firefox using this icon

After this you can select the wich field contains the username and whic contains the password. This can be useful when the browser detects the fields wrong

Java Streams

Java StJava Streams are a not a very known feature of Java to make it more functional programming language.

The benefits of using streams are:

  • Make the code more delcarative , so it’s easier to undestand it
  • Easier to paralelize using parallelStream instead of the basic Stream

The first step to use a filter is to apply it to an Iterable:

List<Integer> example = Arrays.asList(new Integer(1), new Integer(2), null);
example.stream();

Filter

One of the basic operations over a stream is to filter the values of it discarting the elements that don’t acomplish a constraint:

List<Integer> numbers = Arrays.asList(new Integer(1), new Integer(2), null);
// Remove null values
numbers.stream().filter(number->!=null).collect(Collectors.toList());

Map

Another basic operation over a stream is the map operation. This operation converts an element of the stream to another element using a function:

List<Integer> numbers = Arrays.asList(new Integer(1), new Integer(2), null);
// Double
List<Integer> doubles = numbers.stream().map(number->number*2).collect(Collectors.toList());

Also can be declared using the function

List<String> letters = Arrays.asList("a", "b", "c");

List<String capitals = numbers.stream().map(String::toUpperCase).collect(Collectors.toList());

forEach

Executes a function for each element of the stream:

List<String> words = Arrays.asList("hi","bye");

wordsstream().forEach(p -> System.out.println(p));

Collectors

The collectors can be used to convert the stream to diferent types. The more commons are:

List<String> words = Arrays.asList("hi "bye");

List<String> list= words.stream().collect(Collectors.toList());
Set<String> list= words.stream().collect(Collectors.toSet());

Extra methods

There are also extra methods like distinct that can be used to delete the repeated values :

List<String> words = Arrays.asList("repeated", "repeated", "non repeated");

List<String> nonRepeated = words.stream().distinct().collect(Collectors.toList());

Another useful opeation with streams is limit

List<String> words = Arrays.asList("repeated", "repeated", "non repeated");

List<String> oneWord = words.stream().limit(1).collect(Collectors.toList());
Best Eclipse keyboard shortcuts

Eclipse is one of the most used IDEs to develop in Java. Sometimes Java can be complicated or slow to navigate througth the code, but sometimes this happens due we don’t know how to use all the capacities of the IDE

Search a class

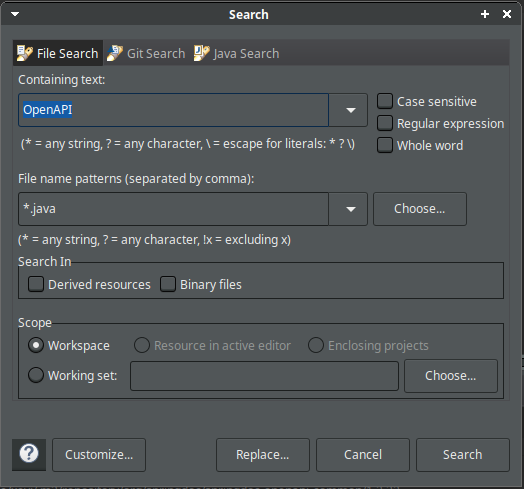
It’s possible to search a class using the shortcut Control+Shift+H

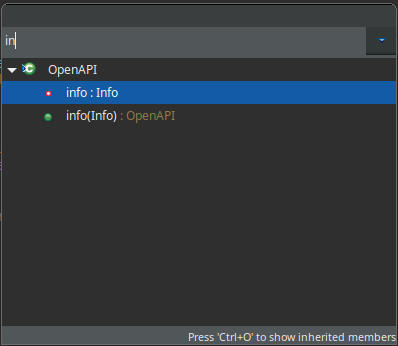
Search a method on the class

When we have a class and want to go to a method we press Control+O this will open:

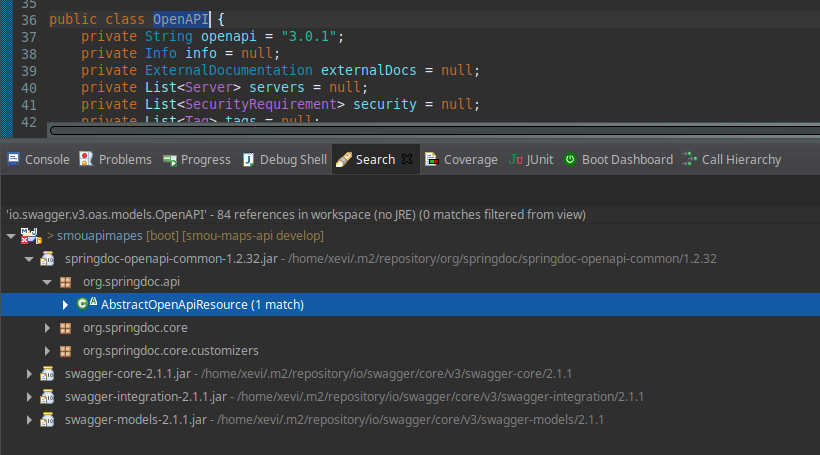
Search the usages of a method

If we want to see where a method or a function is used ,pressing Control+Shift+G Eclipse will search all the usages of the function and show on a result search

Plain search on the code

This should be our last opion when we search on the code but if we press Control+H we can search plaintext on the code

Go to line

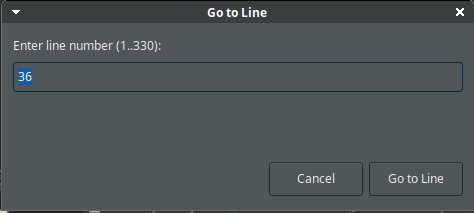
If we want to go to a specific line we can press Control+l

Develop Erlang on Vscode

Erlang is a functional and concurrent programming language and fault tolerant.

Now we will see how to develop Erlang on Vscode

Install Erlang

To start programming in Erlang we need two things, the Erlang environment and rebar3 , a tool to help manage Erlang projects.

To install Erlang just run as root:

apt-get install erlang

Once we have Erlang installed we can install rebar3 :

wget https://github.com/erlang/rebar3/releases/download/3.18.0/rebar3
chmod +x rebar3
./rebar3 local install

After this, the rebar3 executable should be in $HOME/.local/bin/rebar3. Ensure that the .local/bin folder is on your PATH variable to be able to execute rebar3 from the shell.

Install Erlang extensions

Install the Erlang extension using Control+P and execute this:

ext install pgourlain.erlang

Run Erlang on vscode

If we want to run an Erlang application from vscode we need to create a launch.json like this:

{
    "name": "Launch erlang",
    "type": "erlang",
    "request": "launch",
    "cwd": "${workspaceRoot}",
    "arguments": "-s module start"
}

Debug Erlang on vscode

To debug an Erlang application we need to do a previous step. We need to complie the beam files with the +debug_info flag

To do this we need to create a task.json like this

{
    "label": "compile",
    "type": "shell",
    "command": "erlc +debug_info file1.erl file2.erl"
}

And add the preLanuchTask on the launch.json

{
    "name": "Launch erlang",
    "type": "erlang",
    "request": "launch",
    "cwd": "${workspaceRoot}",
    "arguments": "-s module start",
    "preLaunchTask": "compile"
}

Now you will be able to debug an Erlang application from vscode

Quickly create web services using OpenAPI

OpenAPI is a documentation format created by Swagger to document how a web service works. It defines the paths, the methods and parameters. Let’s know how to quickly create web services using OpenAPI

Why I use it?

Usually documentation is one of the tasks that developers don’t like because it can be boring, hard, and take time. In this case it is really quick and it can be a way to increase your productivity, because this documentation can be used to generate.

Starting with OpenAPI

The OpenAPI format can be generated and viewed with a lot of tools, but my favorite is Apicurio, a free tool from Redhat. A great feature of it is that it can be collaborative

Apicurio studio
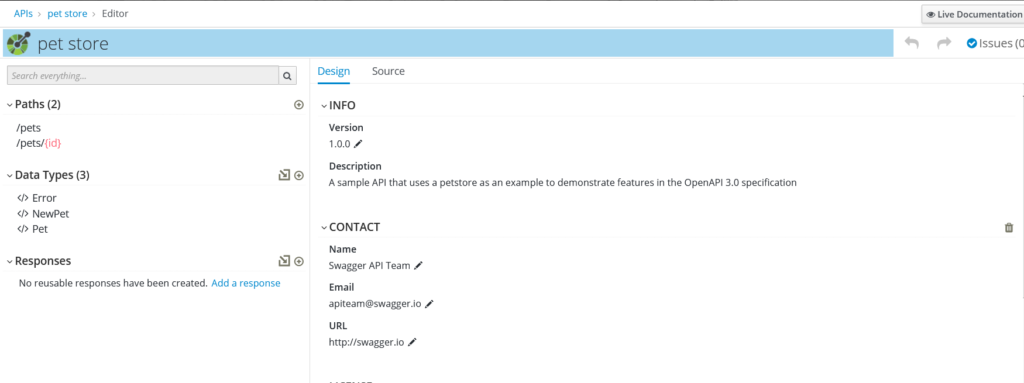
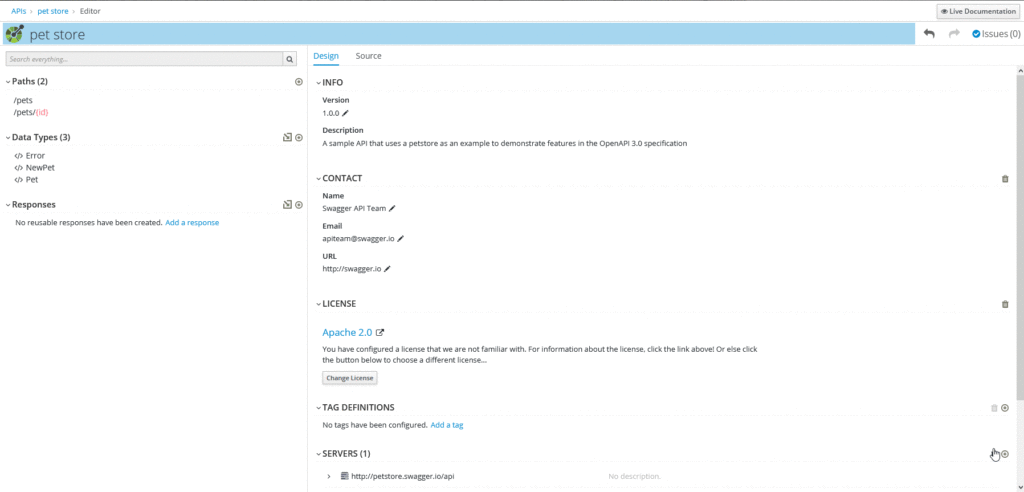
How Apicurio looks like

The Apicurio screen is splited on 4 parts

  • Paths: In this part you can see the paths the application uses, you can also click on it to view more details.
  • Data Types: The data types that the application will use and the relation with other data types.
  • Responses : The diferent types of responses of the application
  • Design: The content of this part can change to edit the details of the previous parts
Example of the configuration of a path

Once we have our OpenAPI defined , here starts the magic. We can generate a template code for our applications. To do this you can use this application https://github.com/OpenAPITools/openapi-generator.

Before generation, the code you will need to download is the OpenAPI definition from the Apicurio web

OpenAPI to Flask

If you are used toPython Flask is a great micro framework to create web applications.

openapi-generator-clo generate -g python-flask -i OpenApi.json -o ./code

OpenAPI to Angular

OpenApi can also help you if you are developing a frontend application. You can generate the service of the API using a simple command and it will generate you the code of the service

openapi-generator-cli generate -g typescript-angular -i OpenApi.json -o ./code

ZSH configuration tricks

Zsh is a terminal for UNIX systems that can be tuned to help you do more work with less effort. In this article I will show you some things that are useful to me.

Usually all the Linux distributions used bash as a default terminal, but there are a lot of other terminals like zsh, csh,tcsh. Most of the time I used Linux I used the default terminal but I tried other terminals and discovered that I like zsh more than bash. You can try another terminal without configuring it as your default terminal, just install the zsh package and execute the zsh command.

Oh my zsh

On this article I used a framework for zsh called oh my zsh that extends the default zsh adding plugins and themes. You can easily install with one command:

sh -c "$(curl -fsSL https://raw.github.com/ohmyzsh/ohmyzsh/master/tools/install.sh)"

Configuration

Plugins

When the zsh starts the terminal, reads the .zshrc file located on the root of your home directory.

The first parameter of configuration that I use is the oh my zsh plugins:

plugins=(
  git
  python
  pip
  virtualenvwrapper
)

This enables the following plugins:

  • git: This is my favorite one,it adds a lot of alias to manage the git, you can check them here. Also , if you are on a git directory indicates if there are unstashed files.
  • python: Like git it adds some useful alias
  • pip: Adds cache on the available pip packages
  • virtualenvwrapper: Auto activates the virtualenv when you cd in a directory that have the same name as an existing virtualenv

Theme

On oh my zsh you can select the theme of your terminal. In my case my favorite is agnoster. You can set it like this:

ZSH_THEME="agnoster"

If you wan to explore the available themes you can find the list here

Alias

On zsh, like in other terminals you can set an alias to shortcut a command. Mine are these:

alias p="ipython3"
alias s="ssh"

These are two applications that I use very often so in this way I can do “s 192.168.1.22” and enter to another machine.

In the case of python,it is because I use the ipython to do quick calculations or test code

CDPATH

When using WSL navigating to different folders can be tedious and repetitive because you are always typing /mnt/c… . To avoid repeating this you can configure the CDPATH variable

CDPATH is a variable that you can use to indicate to the shell where to check when you change of directory. I started using a hash, that is like an alias of a folder, but after I discovered CDPATH that is far better. I have it configured like this:

typeset -path cdpath
setopt auto_cd
cdpath=(/mnt/c/)

On a Linux machine I use the CDPATH with the source directory to move quickly to my source code. You can add multiple directories separated by spaces

Configure sentry on a Ionic Angular app

Sentry is a great tool tool to track errors in our applications, when an error occurs, it is sent to the server, storing it’s trackback and you will receive a notification email. In this article we will learn how to configure sentry on an Ionic Angular Application. On other articles we have seen how to use it with Python.

To explain this, we will start by creating a simple Ionic Application

Sentry with Ionic
Sentry logo

First we create the example application:

ionic start example --type angular tags

Configuration

After this we need to install the npm package

npm install --save @sentry/angular @sentry/tracing

On the main.ts we configure the sentry DSN like this:

import { enableProdMode } from '@angular/core';
import { platformBrowserDynamic } from '@angular/platform-browser-dynamic';

import { AppModule } from './app/app.module';
import { environment } from './environments/environment';

import * as Sentry from '@sentry/angular';
import { Integrations } from '@sentry/tracing';


Sentry.init({
  dsn: 'your sentry dsn',
  integrations: [
    new Integrations.BrowserTracing({
      tracingOrigins: ['localhost'],
      routingInstrumentation: Sentry.routingInstrumentation,
    }),
  ],

  // We recommend adjusting this value in production, or using tracesSampler
  // for finer control
  tracesSampleRate: 1.0,
});


if (environment.production) {
  enableProdMode();
}

platformBrowserDynamic()
  .bootstrapModule(AppModule)
  .catch(err => console.error(err));

Add the ErrorHandler on the providers, on app.module.ts

{
    provide: ErrorHandler,
    useValue: Sentry.createErrorHandler({
        showDialog: false, //You can enable/dissable the report dialog 
    }),
},
{
    provide: Sentry.TraceService,
    deps: [Router],
},
{
    provide: APP_INITIALIZER,
    useFactory: () => () => {},
    deps: [Sentry.TraceService],
    multi: true,
},

Now, with this your application, it is ready to report to the Sentry server. You can test it with calling an undefined function:

undefinedFunction();

If you want to check extra information about this you can check the official documentation

How to have an updated OpenStreetMap database

OpenStreetMap is a crowdsourced database which has editions every second, due this the database that you downloaded a month ago is outdated. To solve this problem I did this little tutorial.

Initial database load

The first step is to load the file to the Postgres. To do this we will use osm2pgsql tool. You can install it with this command

apt-get install osm2pgsql

After this, we can download the actual database from Geofabrik. In this example we will use the data from Andorra:

wget https://download.geofabrik.de/europe/andorra-latest.osm.pbf

Once we have the osm data we load it to the Postgres

createdb osm #Create the database on Postgres
psql -d osm -c "CREATE EXTENSION postgis" # Creates the postgis extension
psql -d osm -c "CREATE EXTENSION hstore" # Creates the hstore extension
osm2pgsql -d osm -s -C 4096 andorra-latest.osm.pbf --hstore # Loads the data 

We need one more step to initialize the replication. In this case we will initialize the osmosis directory on $HOME/osmosis/

mkdir -p $HOME/osmosis/andorra

osmosis --rrii workingDirectory=$HOME/osmosis/andorra
sed -i 's!baseUrl=https://planet.openstreetmap.org/replication/minute!baseUrl=https://download.geofabrik.de/europe/andorra-updates/!' $HOME/osmosis/andorra/configuration.txt
wget https://download.geofabrik.de/europe/spain-updates/state.txt -O "$HOME/osmosis/andorra/state.txt"

Cron task

After we load the database we need to update the database periodically. To do this on Linux we use cron. First we create a scprit, for example on $HOME/update_db.sh with this commands:

osmosis --read-replication-interval workingDirectory="$HOME/osmosis/andorra" --simplify-change --write-xml-change $HOME/andorra_changes.osm
/usr/local/bin/osm2pgsql --append -s -C 3000 -G --hstore -d osm $HOME/andorra_changes.osm

Remember to add execution permisions to the script

chmod +x $HOME/update_db.sh

To configure the task once a day we can add this line on cron

0 7 * * * $HOME/update_db.sh
« Entrades més antigues

© 2025 Another dev

Tema de Anders NorenAmunt ↑